The Art of the Fold

Hedi Kyle

was my favorite book artist before I even knew her name. I learned several of her structures early on in my book making career and loved them for their versatility. You can imagine how excited I was when I heard she was writing a book with her daughter Ulla Warchol that I could peruse at my leisure. I was also hoping there would be new structures to try. The book arrived on October 2 and I got busy making samples and experimenting with structures right away. I was enthralled by the easy to follow diagrams and the paper suggestions as well as information on changing dimensions. Below are pictures of samples I made using my stash of papers and book cloth.

Enjoy!

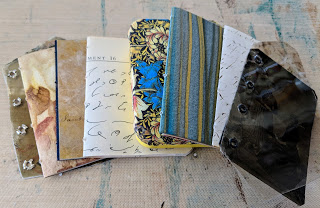
My samples so far from this amazing book!

My variation on the tree fold introduces a long leaf followed by a short one and then a long one. That way half of the leaves (pages) are hidden from view. The possibilities for a book are endless.

The same book open.

The Blizzard Box invented by Bill Hanscom and Hedi Kyle. I also make a square version (in blue).

The Blizzard boxes nested and holding some of my sea glass.

The Star Box is very satisfying to make as Hedi's dimensions give you a perfectly nested box and cover all in one.

Three variations of the School Book Wrapper, 2 with pleats and one without. I used book cloth to make these as it is sturdy and folds nicely around journal inserts.

This structure was new to me and I loved playing with the pop-up. I ended up creating a shape that I could fold into cranes.

I love the simplicity and creativity of this book. The triangle structure is unusual, but it fits so nicely into the covers. I can't wait to use it for an actual artist's book.

Another simple, but effective book structure is this Pocket Accordion with Separate Cover. I had fun coming up with the cat closure.

The Crown Greeting Card is lovely and easy to make.

I have made many Blizzard Books over the years; it was one of the first Hedi Kyle structures I learned. I never thought to create this kind of structure though. Thank goodness for Hedi and this book!

The Telescoping Ziggurat was a new structure to me and I enjoyed folding it and creating two pieces from one structure by cutting the very long strip of paper on the diagonal so that it rises up like a tower.

TInception: or Binding a Tin into a Book

I ordered some beautiful eco-dyed silk noil from Tierney Barden last week and she sent some extra goodies along in the package. One of them was a little yellow tea tin and when I saw it I knew that I wanted to try binding it into a book. I got the idea from Andrea Matus DeMeng in her Propsero's Books class last month. When she was teaching us the coptic stitch she said she had bound a mint tin into a book. I was intrigued and wanted to try it myself.

My daughter Lila saw the first book and joked that I should bind a tin book that fits inside another larger tin and so on, hence the title of this blog and the title of the book she inspired: TInception.

I hope you like the pictures.

-Gina

Mica and Tintype photo cover for my first tea tin bound book.

Coptic stitch is used to sew the signatures and tin together.

Book parts ready to be sewn.

The finished book. I actually resewed this book (not shown) as I made some adjustments on the second one that I wanted to incorporate in this one as well.

Signature on left and tin on right.

Back of the tin and the next signature.

The tin contains some bits Tierney sent me and 3 pamphlet stitched booklets.

Tin contents.


Another signature in the book. I like using vintage papers and photos to give books a sense of time and place.

More book pages/signatures.


TInception; for each book level you descend it becomes an order of magnitude harder to bind! The top level book measures 4 x 2.5 x 1.5 inches.

The bound tin (right).

Book two inside book one. This book measures 2 3/8 x 1 5/8 x 3/4 inches.

The tin bound in book two (right).

Tin book three measures 1 3/8 x 1 3/4 x 1/2 inches. I could only put on a front and back cover before running out of room in the larger tin. It was still the hardest one to bind.

All three books showing their relative sizes.

The 3 little books bound and nestled inside the final tin.

All 3 books showing the photos and mica covers.

The binding of each book.

I used mica and antique writing from autograph books or inscriptions from old books as the back covers. I love the way the natural mica has inclusions that look like ink spots.


Prospero's Books

I recently spent 5 days in Idyllwild, CA at their Art Center taking a class from Andrea Matus DeMeng , intriguingly titled Prospero's Books. We had an ambitious plan to make 4 different books and decorate a wooden box to hold them all in just 4 days! It was a busy and creative time and I didn't finish everything there. I am still not really finished, but here is my version of Prospero's Books so far.

Enjoy!

-Gina

Prospero's Books: The Book of Harsh Geometry, The Book of Mirrors, The Primer of Small Stars, and The Book of Architecture and other Music.

A different arrangement of the books.

The Book of Mirrors, coptic stitched with folded signatures and single sheets bound together.

A page spread in the Book of Mirrors.

The Canadian binding was used for the Book of Architecture and other Music.

A page spread from the same book.

The Primer of Small Stars is of course a small book bound using long stitch.

The case bound Book of Harsh Geometry resonates with me as Geometry was my most difficult class in high school. I barely passed. I also find case binding difficult so they work well together.

Page spread from Harsh Geometry.

The Book of Water, long stitch binding.

I used plastic sheets to create this book's pages as I wanted the contents to look like water.


Sculpting Dyed and Painted Papers

I have been eco-dyeing paper for a few weeks. I also played around with another Leslie Marsh technique which uses paint to print leaves onto black paper. With lots of paper piling up on my work table I decided to turn some of them into a paper sculpture. Here are the results.

Enjoy!

Some of the painted leaf papers. Mom and I used Ranger Dylusions paints and a gel press plate to make these. Roll paint on the leaves, brayer a contrasting color on the gel plate, apply the leaves, place black paper on top and press. This technique is so fun and fast that I made about 20 pages in one sitting. 

I used the painted leaf papers to make the book spine. In my other blog post about this structure I used a single sheet of paper cut and folded to make the spine. Here I used a different sheet for each section then used leftover painted paper as hinges to hold them together.

I used the pale Texoprint paper from week 2 ago for the folded inserts. 
I like the contrast of the dark and light papers.

This is the finished sculpture. I love the shapes and colors and subtle leaf patterns everywhere.


Still Eco-Dyeing: Week 3

I am still playing around with eco-dyeing a month after taking Leslie Marsh's workshop. I usually get distracted by a shiny new technique, but I think this one appeals to my science brain. I am experimenting with different papers, plant materials and water baths. I just want to keep trying out new combinations. Here are the results from this week's batch.

Enjoy!

I used Arches Textwove and Somerset Book paper for this week's project. I cut the large sheets (20 x 26) into 3 long strips, sprinkled leaves on top and rolled them onto my copper tubes. They were tied with twine and boiled for 1.5 hours in water, vinegar and Ranger Distress dye (Vintage Photo). 

1. Spanish moss, onion skin and eucalyptus leaves sprinkled on Arches Textwove.

2. Liquid amber, spanish moss and eucalyptus leaves on Somerset Book paper.


3. Onion skin and liquid amber on Arches Textwove.

The papers still wet from dyeing are number 3, 2, and 1 from left to right. The Arches came out the best again with the Somerset looking pretty, but pale in comparison. The onion skin surprised me with its orange-brown color. I was hoping for purple. The edges of the papers did come out purple so that may be where the color went. The liquid amber seems to be very yellow in the recent batches I have made. I continue to enjoy the process and the results.

Here are the finished papers, cut down and folded to fit in my journal.

 Please check out my next blog to see what I made with some of last week's papers.

Dyeing Paper and Workshop Pictures

I took a workshop last weekend with Leslie Marsh and she taught us how to eco-dye paper using leaves, onion skin and water dyed with walnut shells. I have wanted to try this for some time and it was so easy and thrilling to see the results that I wanted to try it at home. I looked up ways to make dye from natural materials and found this site. I made 3 dyes: avocado skin, avocado pit, and pomegranate skin. My favorite is the avocado pit as it makes a delicate pink dye. The pomegranate skin was supposed to be maroon, but came out yellow instead. Here are some of the dyeing effects I got from the three dyes.

Enjoy!

Avocado pit dyed papers. The small one was stamped and clear embossed before dyeing.

Avocado skin dyed papers.


Pomegranate skin dyed papers.

Some of the ephemera I dyed using the three dyes.

Trying out different techniques. This one was dipped in a puddle of dye, dried and dipped again. I repeated this 3 times, drying between each application of dye. I like the details and pooling this produces.

This paper was dyed with avocado pit dye then dried. Then I used a spray bottle with the same dye to get droplets on the paper. I dried the paper immediately with a heat gun so the drops wouldn't spread out and disappear.

This paper was dyed with avocado pit dye, dried, stamped and embossed then dyed again with avocado skin dye. I think this one is my favorite. I like the way the embossed part resists the second layer of dye and shines while the non-embossed paper is dull. It's a nice contrast.

Eco-dyed papers from Leslie Marsh's workshop: Stamped Nature Bound.

My workshop book in pieces before I coptic stitched it together.


Mixed Media Book Covers

Today's post is a blast from my past. I was recently visiting my mom and she showed me a set of collaged vintage book covers I made her several years ago. I had forgotten about them, but was inspired to make myself a set. Mine are wrapped in a packet and contain poems about birds. Please see pictures below for materials and the finished project that was inspired by an article from Somerset Studio called Poetic Packet Collages.

This post is also inspired by Mixed Media World challenge #3. I used vintage book covers, stamps, maps, and images from old dress patterns to make the covers. Enjoy, I'm off to the studio to make more!

-Gina


Finished Packet


Contents of the packet; front and back covers with collage elements and poems on tracing paper.


Component 1: Vintage dress pattern images.


Component 2: Vintage book covers.


Component 3: Maps, marbled paper, etc.


Component 4: Vintage stamps and samples of marbled paper.


Component 5:Tracing paper with topographic lines in pencil to add depth to the packet wrapper.

How To Make Artist's Books: Book Recommendations

My friend Nancy suggested that I do an occasional book recommendation for book artists, origami enthusiasts and paper crafters. Since I was a blogger in need of a post it seemed like a good fit. So here is my first list of books on book arts. These are ones that I return to time and again for structure and content ideas. You can get them at your favorite online bookstore. I hope you find some inspiration or a new treasure here.

My top three recommendations are:

1. Creating Handmade Books by Alisa Golden has clear, concise text and illustrations for making everything from simple one-page structures all the way up to multi-signature sewn structures.

2. Making and Keeping Creative Journals by Suzanne J. E. Tourtillott is a feast for journal lovers. She offers innovative structures to match topics such as gardening, birding and art journaling.

3. Sleight of Binding by Cherryl Moote offers playful structures to lift your books into the third dimension. You will find kinetic and interactive designs in shapes and colors that wake up your creative mind.

Here are some pictures of my work using these books for instruction and inspiration.


 Book/card with tunnel from Creating Handmade Books. (2014)


Jacob's Ladder book (front and back) and content from Creating Handmade Books. (2004)


Jacob's Ladder "Flight" book from Creating Handmade Books. (2009)


Journal with different color and size pages from Making and Keeping Creative Journals.


Inside of journal showing content. (2003)


Inside the Dos-a-Dos book. (2003)


 Glove book inspired by one in Making and Keeping Creative Journals. (2007)


Gallery Book from Sleight of Binding. I modified Cherryl's structure by leaving the paper on the front of the "windows" and using it to fold the cranes. (2012)


Cherrly's book Sleight of Binding has many kinds of flexigon structures. Here are three that I made using Graphic 45 papers. (2014)